At this point I have pretty much decided that making things from scratch, or almost-scratch, is what I’m all about. So my mom, sister and I tried our hands at soap. Now I will admit we didn’t start from complete scratch on this one, as we read how dangerous lye can be, so we started with these really great soap bases from Hobby Lobby- we used the Goats Milk Soap Base and the Glycerin Soap Base (which doesn’t seem to be available online). After reading some different recipes and blog posts, we decided on a few ingredients we already had in our houses.
Here is what we started with:
We melted the soap base cubes in a microwavable glass bowl, at about 20 second intervals. We noticed the glycerin base took much longer to melt fully, and therefore got a lot hotter.
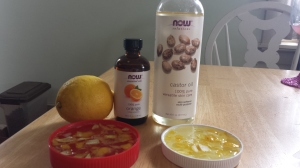
And here are our soap ingredients:
This one is the glycerin soap base, lemon peel, and orange oil.
For this one we used the glycerin soap base and brown sugar, vanilla extract, and mint leaves.
Goats milk base with vanilla extract, brown sugar, castor oil, and oats.
For the final one we used the goats milk base and recycled coffee grounds. I didn’t get a picture of the ingredients because I had stepped outside to help the guys with the water line project, and my sister and mom got tired of waiting for me. I really liked this one because all I had to do was save coffee grounds from the previous week’s coffee!
Another note to add, I did read to spray each mold with rubbing alcohol, as the soap base tends to bubble, and this prevents that from happening. Also spray the top of the soap after it is poured into the mold.
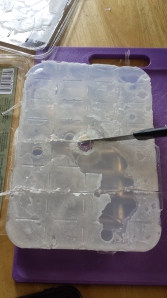
Now you might notice that our soap molds are random leftover containers. Plastic sprout containers, lids, and butter containers. The plastic sprout containers worked the best because they were pliable enough to pop the soap out once it had cooled, but they were also susceptible to heat and we were not able to reuse them. The butter containers and lids were not flexible enough to pop the soap out of, so we had to pry them out with a knife, which made the soap edges not so pretty. I am currently doing research on what works best for molds, without having to spend a lot on actual soap molds. I suppose if you plan on making a lot of soap, and can reuse the molds, then it would be worth it. I would like to make soap again soon, and start giving them out as gifts to family and friends!
And…final products! We were really happy with the way they turned out and are already using them!


